Immediate Steps to Water Damaged Laptop
Having a water damaged laptop? It is quite huge issue needed to get immediate attention.
When this happens to someone, usually they have two thoughts in mind. Whether the problem can be fixed with laptop water damaged repair or it has gone forever. Still, many people think the laptop is dead and would not be used in the future as they spilled water on the keyboard, but in some cases this is not the only outcome. It is possible that some damage is done, but with steps for Liquid Damage Repairs that are mentioned here can work wonders in favour of you.
WHAT TO DO
When water spills on a laptop, it is likely that major damage will have been done. However, if immediate attention is given, the laptop can be saved from the water damage.
Possibly, laptop liquid damage repair is not that easy as it sounds and this tricky work requires some experience with electronics disassembling.
For basic steps that can be performed at home, you don’t need much. First of all grab a DRY TOWEL and microfiber cloth. These are the most important items when dealing with liquid spillage on your laptop.
1. IMMEDIATELLY
TURN OFF THE LAPTOP
The laptop should be turned off and disconnected from the power source as soon as possible. Press the power button until the laptop turns off.
Save any important documents immediately, then hold down the power key for around five seconds to shut down the computer.
Quickly remove the charger cable from the laptop to disconnect it from a power source. Laptop must not get any power to save internal components from shortage.
Remove all easily detachable components. Unplug your mouse dongle, any cables and remove any flash drives. Leave your laptop bare.


2. REMOVE EXCESS LIQUID
If there is any residual liquid on the laptop, remove it.
As a result, you will decrease the risk of an electrical shock as well as minimize your laptop’s exposure to more liquid.
You can use dry towel for this or just turn the laptop upside-down to get rid of residual liquid.
Make sure your laptop is facing down while you cleaning excess liquid. This way liquid won’t get into the internal components.
3. REMOVE BATTERY
Remove the battery from the laptop. By doing so, liquid will be prevented from reaching the battery unit and posing an electrical hazard to internal components.
Remove battery only after you’ll disconnect the laptop from power adapter. Unplug laptop first!
You can remove battery by turning your laptop upside-down, sliding a battery lock to the side and gently tugging on the battery.
It is not possible to easy remove battery on some laptops. On Macbooks and most ultrabooks the battery is inside. You need to unscrew bottom casing of the laptop to access the battery connector.

4. PLACE LAPTOP
ON THE TOWEL
Place a dry towel on a flat surface in example table.
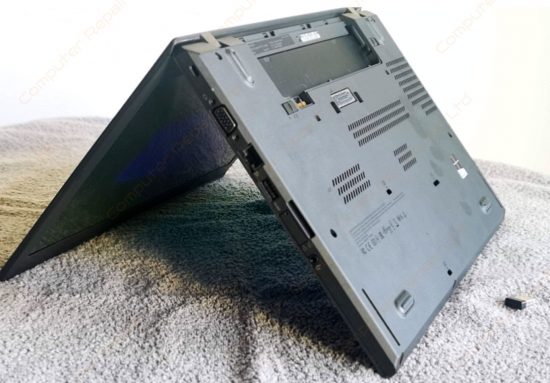
Open your laptop as a book and lay it face down on the towel. The best form is tent shaped laptop laying upside down. This will speed up the drying process.
You can use a warm fan to help evaporate the liquid faster.
This is how you’ll keep the laptop for at least few days, so make sure you choose a dry, warm and unobtrusive area.
5. REMOVE HARDWARE
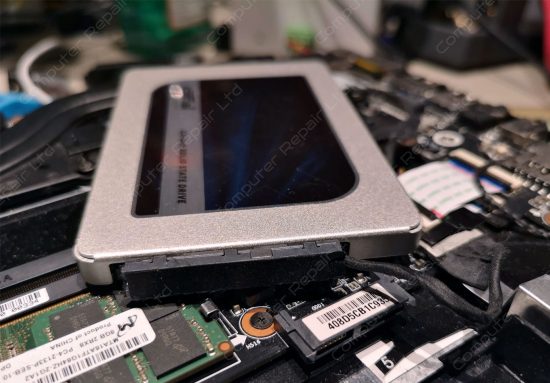
Remove as possible hardware as you can. Take off bottom cover and remove all possible hardware.
Take out and wipe water from hard or ssd drive, RAM modules, wifi module and motherboard parts.
If you don’t know how to remove RAM or other detachable internal components, better take your laptop into a professional repair service. You can learn about or laptop liquid damage repair service here.
If there is and excess water inside your laptop, carefully drain it with microfiber cloth.
If you have a Surface, MacBook, ultrabook or any other laptop that you cannot take apart or even remove the battery, place the laptop upside down and take it to a repair center ASAP.

6. REMOVE KEYBOARD
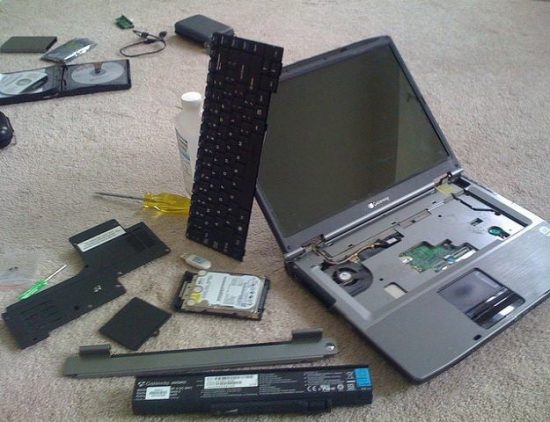
When you have spilled water, tea, coffee or any of the liquid to the laptop, it may reach into the internal parts via keyboard. One of the most important step is to disconnect the keyboard after turning off the laptop.
When you would have got done the process, then also you can check whether the water or liquid touches the motherboard or not. Simply clean the keyboard using dry, lint free cloth and If any stickiness is there, then clean with alcohol.
Place keyboard upside down on the towel near the laptop.
7. LET IT DRY
Leave your laptop to dry for at least 24 hours. The best solution is to leave it for two days.
Store your computer in the warm dry place. You can use dehumidifier or warm fan to help it dry quicker.

8. WASH THE MOTHERBOARD
If you are tech savvy, you can wash your motherboard to remove any residue sticky liquid to prevent motherboard against oxidizing.
You’ll need special ultrasonic bath and special liquid. They are expensive to buy and it is usually cheaper to bring laptop motherboard to qualified computer repair shop for washing / cleaning.
9. REASSEMBLE THE LAPTOP
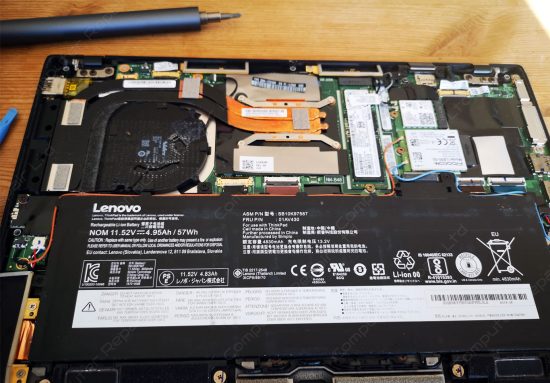
When two days have passed, return the components to the laptop. Put them back in the same order you take parts out. Connect the battery last, to prevent static damage.
Hopefully these steps have been enough to save your equipment and your laptop if working fine. If laptop is turning on, test everything – sound, screen, usb ports ect.
If it does not boot up or you notice distortion in the display or sound, or any of usb port or wifi is not working, you’ll need to take your laptop to a professional laptop liquid damage repair service.
WHAT NOT TO DO

1. DON’T TURN ON
Don’t turn on your laptop in the middle of the drying process. Give it at least 24 hours to dry. Be patient!
Turning laptop with liquid inside can cause more damage and ignite a dodgy circuit, putting your files and hardware at risk.
2. AVOID CLOTH WITH LINT
To dry excess liquid never use any cloths containing lint. Using clothes with lint can cause further damage to your laptop and make things even worse.
Use microfibre cloths to remove liquid from your laptop. To dry small, hard to get to areas in your laptop use cotton earbuds.

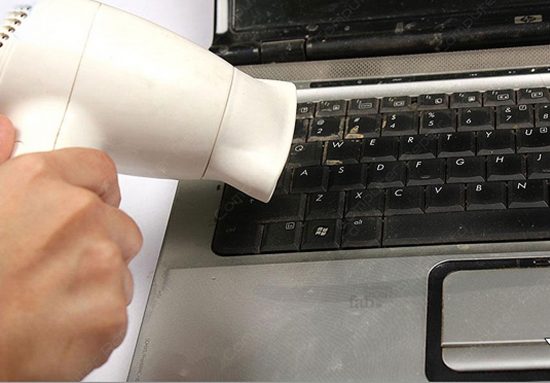
3. FORGET HAIR DRYER
Very important rule is to never use hot air from hair-dryer. The heat can and will cause damage to the laptop. Strong wind forces liquid to go deeper inside the laptop reaching more internal components. Very hot air usually makes keyboards to melt, making you laptop unusable.
If you really want to use air to dry laptop quickly then make sure it’s low pressure, not hot and won’t cause further damage to your device. Use dehumidifier or low speed fan to speed up laptop drying.
4. DO NOT SHAKE
Never shake your laptop to get rid of excess liquid. Shaking will allow water to get deeper into laptop, reaching and damaging more inside components.
Put you laptop upside down, open it like a book and let the gravity work.
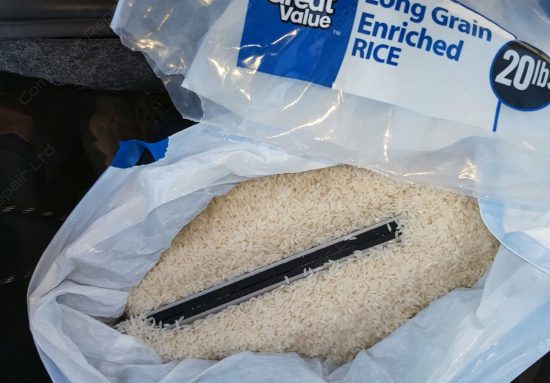
5. DON’T USE RICE
We do not recommend to put your liquid damaged laptop in a bag or bowl of rice. We tested – it just does not work.
Rice doesn’t do much in the way of fixing a spill. What will happen – you have to do more work in cleaning out rice, which could damage some of the internal laptop components. It really doesn’t work, and if anything, it could harm the computer in the future.
Soaked With Water – If huge amount of water still left under the case first thing to do is to leave laptop upside down like open book. You need to leave it for at least 24 hours before trying to turn it on. If you can feel that water still present after 24 hours, then laptop water damage repair is highly difficult and better you should consult the professional to deal with the situation. Still, it is suggested to not to turn on the laptop until the professional have made that repair as possibly the water present at the circuit may end with huge damage.
Claim Insurance – In case, you have bought the laptop recently, then whether the small or huge water damage is there, but you need not to touch it or better we should say not to try repairing it at home. Idea is to take it to the reputable service center provided by the insurance. If you try to repair laptop by yourself it will void the warranty and it can void insurance as well.
More about water damage repairs http://www.wikihow.com/Save-a-Laptop-from-Liquid-Damage